The Learn to Play Series offers 12 quick videos on what is Battle for Sularia, types of cards, how to play, all the parts of a player’s turn, and more. Subscribe to our YouTube channel to receive an update whenever we post a new video.
Please Note: This series will be updated in the near future to four quick videos on what is Battle for Sularia, how to play, deck building, and game play formats.
As a Battle Commander—whether it’s political savvy, charm, or fear—you must have one these characteristics in abundance in order to attract the followers necessary to build your mighty empire. Every card in your deck can be used as influence. As your reputation builds, your ever growing influence will allow you to establish sites, from which you will be able to harness the very lifeblood of the planet itself—the most powerful of resources—sularium.
Fueling your engine of war. Each deck has site cards which generate sularium. As the battle rages on, you’ll put more and more sites into play from your deck, giving you access to more sularium to deploy even more powerful combatants as well as game changing abilities and effects!
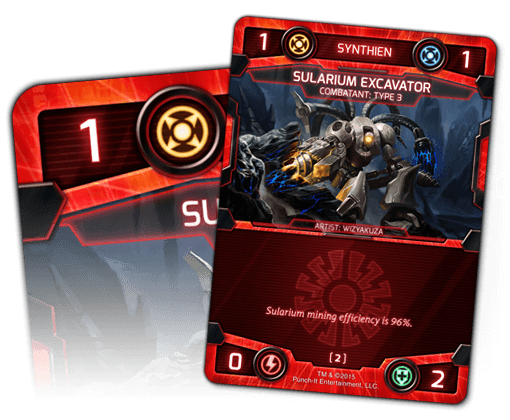
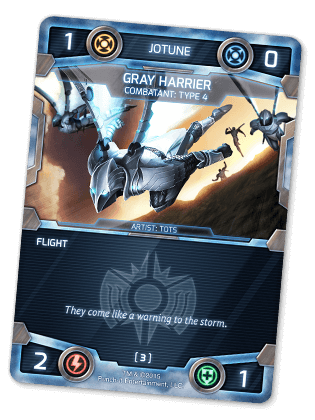
Combatants come in a variety of power levels and abilities. They can be used to attack your opponent’s sites as well as defend your own. Some combatants have special characteristics and abilities, which can dramatically affect the course of the game and increase your odds of winning the battle.
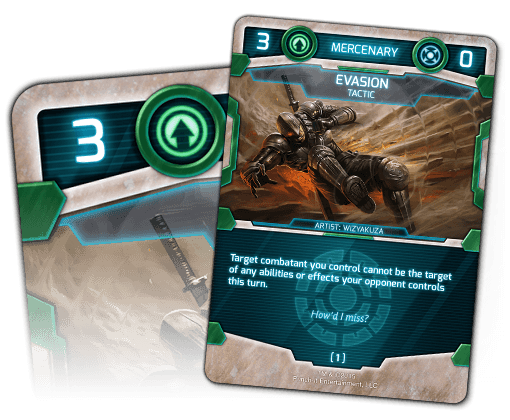
The rest of your deck is made up of powerful effect cards—called tactics and conditions. These cards represent the tricks, skills, and enhanced technologies you may acquire over the course of the battle. They boost the survivability of your sites and combatants, while providing additional power to destroy your opponent’s sites and combatants, and much more. These cards work off a timing mechanic, called Threshold. You can play any number of tactic and condition cards with a value equal to or less than the number of cards in your Influence row.
Players start the game with 25 health. In most games, if you reduce the health of your opponent to zero or less, you win! Yes, you read that correctly—players health can go below zero. This is important to note, because Battle for Sularia is a turn and round-based game system. Each player must take their turn in a round. At the end of a round, if both players health is zero or less, the player closest to zero wins the game.
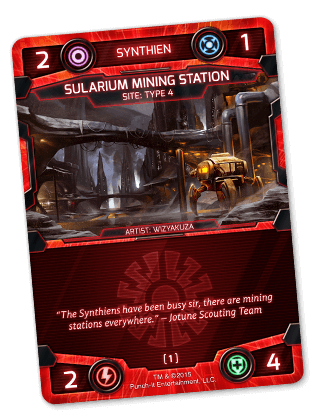
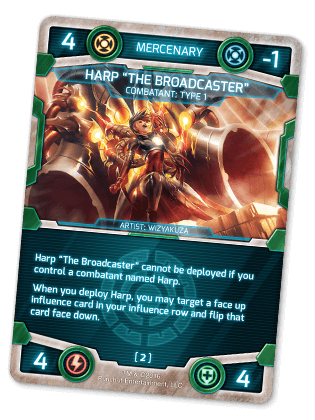
Combatant cards are the most important part of many decks. They’re really easy to spot—just look at the top-left corner of the card. If you see a yellow sularium icon, you’ve got a combatant card. Once it’s on the battlefield, a combatant continues to attack and defend for you until your opponent can find a way to destroy it.
Battle for Sularia uses two resources—Influence and Sularium. Combining influence and sularium is the equivalent of mixing nitrous oxide and gasoline—and like an engine—the right mix turns your deck into an unbeatable machine!
As your reputation builds, your ever-growing influence will allow you to establish sites. From these sites, you will be able to harness the planet’s most powerful energy resource, known as sularium. Over the course of the game, you’ll put more and more sites into play, giving you access to greater stores of sularium to deploy even more powerful combatants.
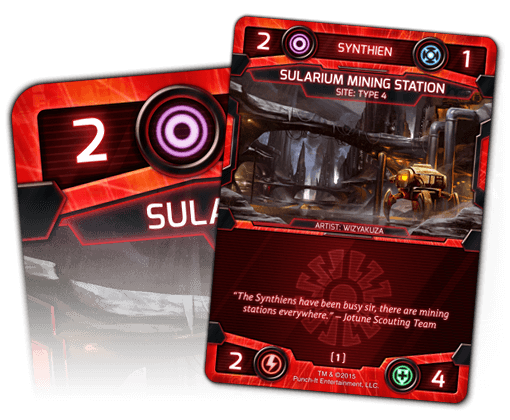
Influence can be made from any card in your deck. However, while site cards look similar to combatant cards because they both have an attack and defense value, they cannot attack—only defend. The easiest way to identify a site, is to look at the top-left corner of the card. If you see a purple influence icon, then it’s a site.
Site and Combatant cards are literally the meat and potatoes of a Battle for Sularia deck, but players have a number of ways to jazz things up. For starters, some site and combatant cards have built-in special abilities for surprise game play. However, since they can be seen in play on the battlefield, your opponent may develop a strategy to work around those abilities.
In order to completely surprise your opponent, cards like tactics and conditions can be played from your hand or influence row instantly with a potentially devastating effect to your opponent’s combatant and site cards. Since they are essentially invisible to your opponent until they are played, they are considerably more difficult for your opponent to anticipate and work around.
For example, say your opponent is attacking with a couple of normal-powered combatants into a site that had no defenders. Typically, the combined might of your opponents combatants would be enough to demolish your site. But you’re a master of deception and you’ve played a tactic card called “It’s a Trap.” As its name implies, you’ve sprung a trap on your opponent’s combatants. Essentially, turning your site into a death trap by boosting its offensive firepower and speed at which it strikes. In a blink of an eye, you’ve obliterated your opponent’s forces while your site remains safe.
Now, let’s say that same scenario were to happen again, but this time, your opponent was not fooled by your deception. Instead, your opponent had been secretly training these combatants to be stronger and more durable. So instead of the his forces being obliterated by your site, your opponent plays a condition card called “Art of War.”
In this example, not only does his combatants survive the trap you had sprung, but this is an ongoing effect of their advance training, which will continue to affect the physical characteristics of all his Jotune combatants for the rest of the game!
Oops, We’re Sorry…
This example diagram is currently back in the shop for some much needed repairs. In the meantime, please check out the Learn to Play Rules Guide: Alpha Edition available as a FREE download in our store.
Currently, the only known factions on Sularia with the power to take over the planet are the Jotune, Synthien, Exsularian, and Protoan. However, the battle has just begun! Furthermore, there are some who choose profit and adventure over their original faction loyalties—in other words, a Mercenary.
While not a fully-operational faction, there are a number of Mercenary cards to choose from to include in your deck. What’s unique about Mercenary cards, is that they can be used in any faction. Mercenary cards add flavor and additional layers of strategy to your game play.
In Battle for Sularia, players use their combatants to attack their opponent’s sites. If the opponent has no sites in play, then they may attack the opponent directly. In either situation, the opponent may use their combatants to defend their sites or themselves. A player may use a single combatant or multiple combatants, known as a Joint Strike Force, to attack their opponent’s site.
A player may use their combatants to defend their sites and, in the unfortunate event they have no sites in play, they can use their combatants to defend themselves. A player may use more than one of their combatants to defend against a single attacker. Some keyword abilities, like flight, on an attacker make it impossible for most combatants to defend. Remember to always check what keyword abilities the attacker may have before you attempt to defend it. Otherwise, it’s likely your opponent will simply laugh at you while he informs you that your defenders are not capable, i.e. good enough, to defend his superior forces—adding insult to injury!
Damage can be dealt in multiple ways. Typically, it comes from a site being destroyed and placed in the discard pile. When one of your sites is placed in the discard pile, you will lose health equal to the influence cost of that site. If the opponent’s combatants deal more damage than your site’s defense value, any overflow amount of damage— known as blast through—is also subtracted from your health. Players may also have cards in play with special abilities that deal direct damage to their opponents, as well as powerful tactic cards to inflict damage.
After the combat, anything that didn’t die, heals up and lives to fight another day. Damage is not persistent, so both your combatants and sites that survived the turn will recover to the defense values printed on the card. In addition, if it was your turn, you will need to count the number of cards you have left in your hand. If you have more than seven cards, you must discard down to seven. If you were the off-initiative player and both players have a health total below zero, the player closest to zero wins the game.
With the exception of your first turn, at the beginning of your turn, you must reset all your activated cards to their vertical position. After you have reset your cards, you must then draw two cards.
Players are required to play one influence card per turn on their turn. Influence cards can be any card and are played face-down in your influence row. Influence is one of two resources in the game and it is used to establish your sites. As long as you have a card in your influence row—face up or down—it can be used as an influence resource.
Play Influence – Part 1
In this example, the player already has one card in their influence row…
Sites allow a player the opportunity to expand their sularium development and grow their stockpiles, which in turn pays for the cost of their combatants. During the site phase, a player may establish any number of sites equal to or less than the amount of influence they have for the turn. Typically, the amount of influence available to the player on their turn is easily calculated by the number of cards in their influence row. After you have played your sites, you will add up all the sularium they generate in addition to any other cards you have in play that generate sularium. This sularium is primarily used to deploy combatants in the next phase.
Play Site – 2 Influence in Play – Part 1
In this example, you have two cards in your in play in your influence row. They generate 2 influence resources.
Play Site – 2 Influence in Play – Part 2
With 2 influence resources, you can establish two sites that cost 1 influence each, or…
Sites generate sularium, which is the resource needed to deploy you combatants. During the combatant phase, players can use the sularium to play any number of combatants they can afford to pay with their available sularium. When you deploy a combatant, it comes into play activate, which means it comes into play in the horizontal position. Since a combatant comes into play activated, it cannot attack or use any of its activated abilities. During your next turn, in the reset and draw phase, you will reset combatants that were deployed in your previous turn—as well as all cards you have in play that were activated.
Play Combatant – 3 Sites in Play – Part 1
In this example, you have three sites in play and they generate 3 sularium resources.
Play Combatant – 3 Sites in Play – Part 2
Since you have 3 sularium, you can deploy a combatant with a sularium cost of 3 or less. When you deploy a combatant, it comes into play activated.
In Battle for Sularia, players use their combatants to attack their opponent’s sites. If the opponent has no sites in play, then they may attack the opponent directly. In either situation, the opponent may use their combatants to defend their sites or themselves. A player may use a single combatant or multiple combatants, known as a Join Strike Force, to attack their opponent’s site.
Defending
A player may use their combatants to defend their sites and, in the unfortunate event they have no sites in play, they can use their combatants to defend themselves. A player may use more than one of their combatants to defend against a single attacker. Some keyword abilities, like flight, on an attacker make it impossible for most combatants to defend. Remember to always check what keyword abilities the attacker may have before you attempt to defend it. Otherwise, it’s likely your opponent will simply laugh at you while he informs you that your defenders are not capable, i.e. good enough, to defend his superior forces—adding insult to injury!
After the combat, anything that didn’t die, heals up and lives to fight another day. Damage is not persistent, so both your combatants and sites that survived the turn will recover to the defense values printed on the card. In addition, if it was your turn, you will need to count the number of cards you have left in your hand. If you have more than seven cards, you must discard down to seven. If you were the off-initiative player and both players have a health total below zero, the player closest to zero wins the game.